
In this month’s edition we will describe the application of perimeter flashing at both high and low concrete parapet walls. As we have noted several times in this section, proper flashing details are critical to the success of the roof system (no matter what type of membrane system is applied) because approximately 75 percent of all roof leaks are reported at flashings and penetrations.
There are some flashing application methods that are standard and are required for all membrane systems. For instance, the flashing material should always be fully adhered to the substrate even on loose-laid and mechanically attached single ply systems. The flashing material should be applied to the required height on the substrate and out onto the roof membrane a minimum of four (4) to six (6) inches depending on the membrane manufacturers specific requirements.
The flashing details identified are for application on a concrete parapet wall. For application on the low wall (BUR-7) – where the wall height is less than 24 inches above the roof surface - the flashing material is applied up and over the top of the parapet wall and fastened to the top of the wall with the appropriate fasteners every six (6) inches on center.
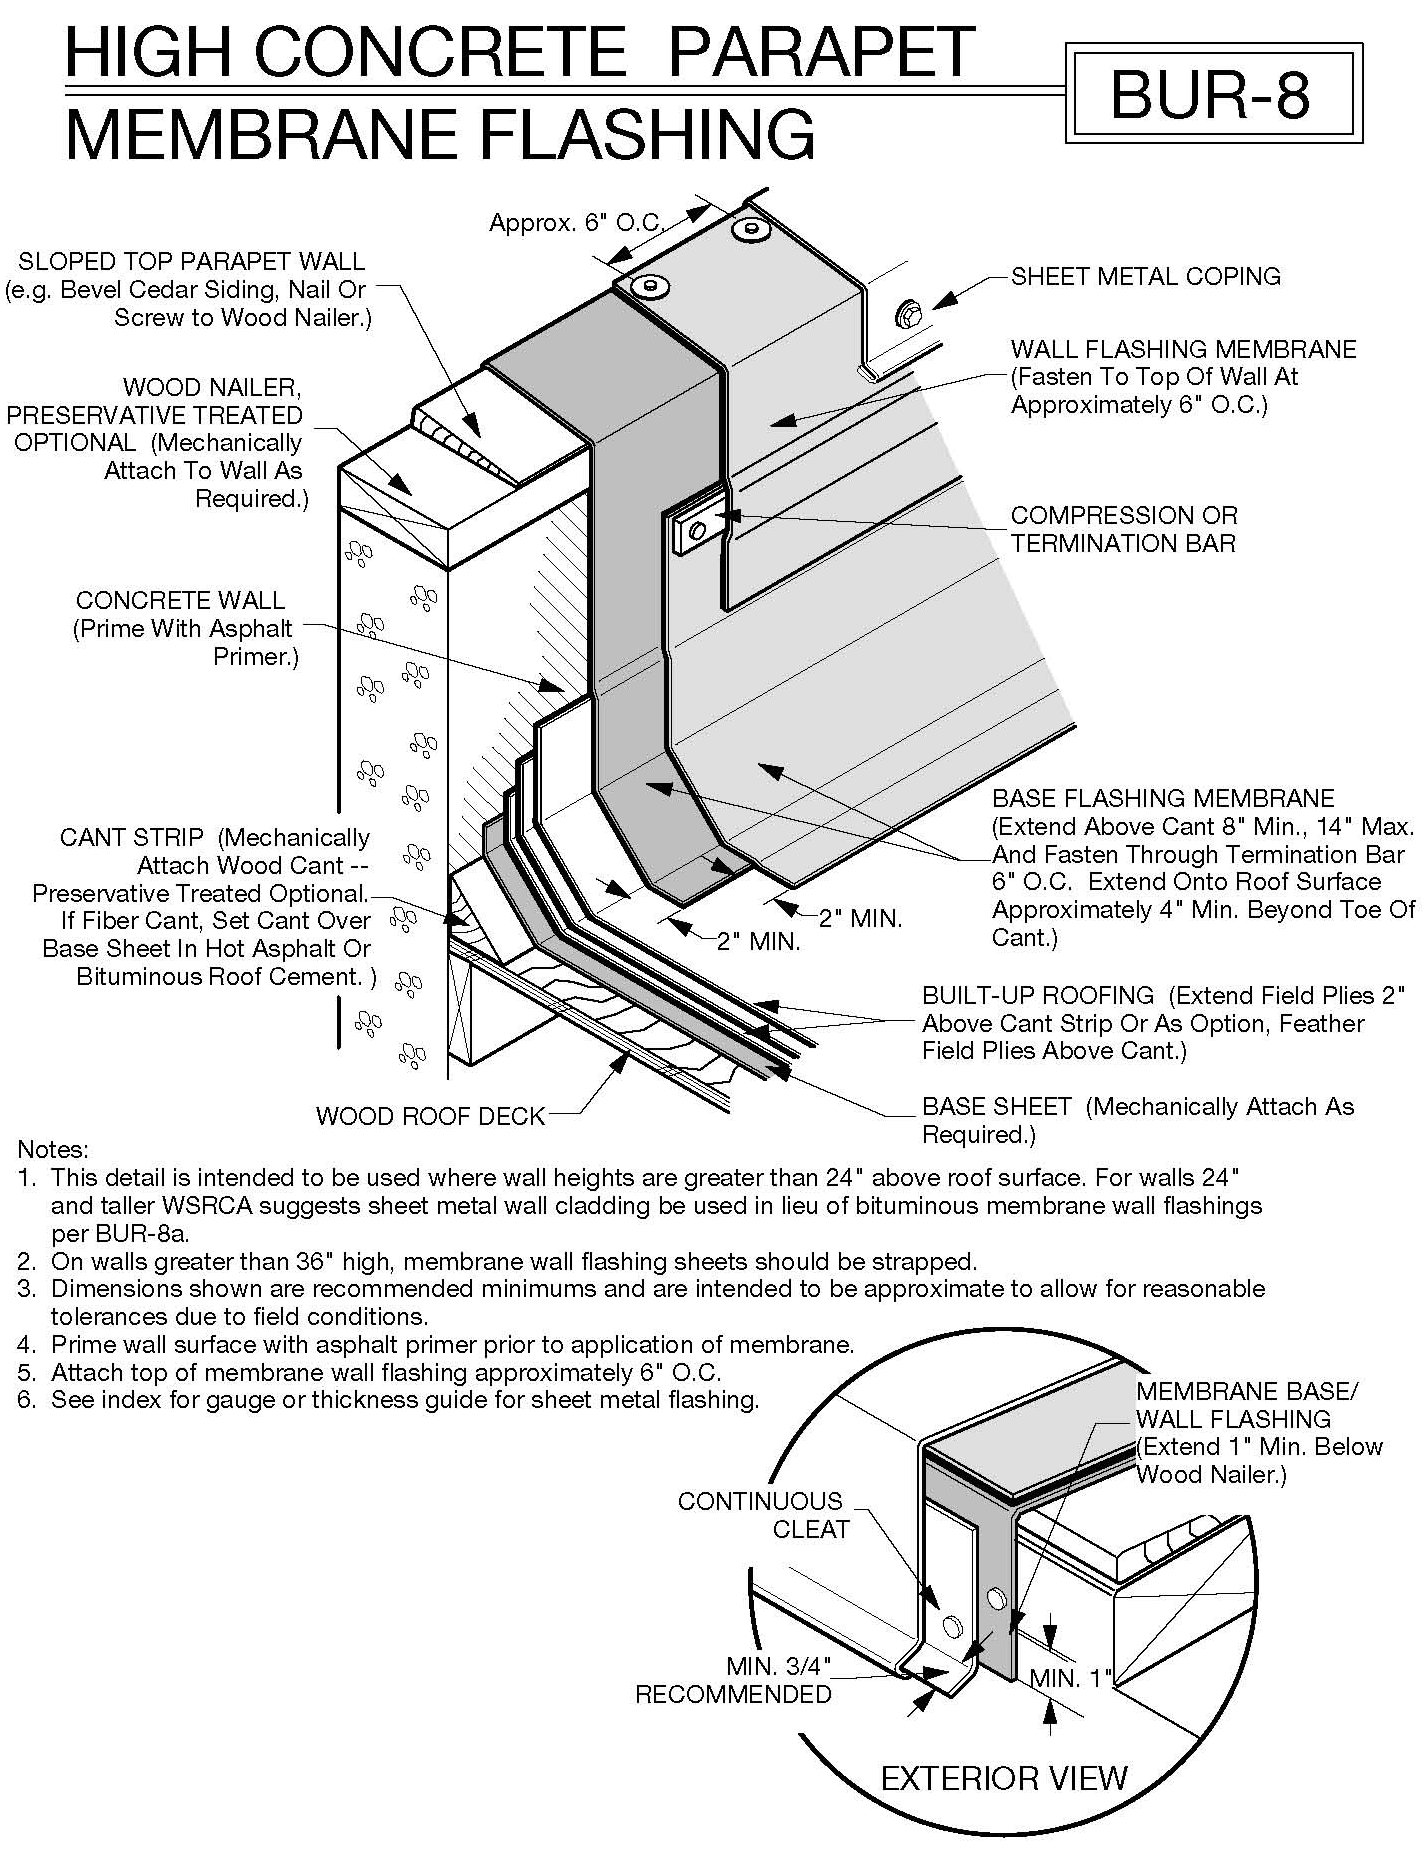
For higher parapet walls (BUR-8) – where the wall height is greater than 24 inches above the roof surface – the application methods are identical with one added step. The installation of a termination bar is required for flashing materials applied over 24 inches. The termination bar should be applied between the middle and top of the flashing material depending on wall height to prevent slumping of the material. It is recommended that flashing materials are further reinforced with straps on walls in excess of 36 inches in height.
 |
| Photo Courtesy of WSRCA |
 |
| Photo Courtesy of WSRCA |

